How to Make a Calendar in Google Sheets?
Creating a calendar in Google Sheets is a great way to keep track of your schedule, whether you’re managing your personal life or coordinating with a team. However, setting up a calendar from scratch can be a daunting task, especially if you’re not familiar with the platform.
Fortunately, there are several templates and tools available that can help you create a calendar quickly and easily. In this article, we’ll explore how to make a calendar in Google Sheets, and we’ll also discuss some common pain points that users face when using spreadsheets to track their schedules.
Although Google offers a dedicated app called Google Calendar to handle your calendar, some people still want to make their own calendar due to enhance flexibility and features.
Here at The Usual Stuff, we’ll show you how Google Sheets can help you overcome these challenges and streamline your calendar management process. So, whether you’re a seasoned Sheets user or a newcomer to the platform, read on to learn how to create a calendar in Google Sheets that works for you.
How To Create a Calendar in Google Sheets
You have two main options to make a calendar in Google Sheets:
- Using a template or
- Building one from scratch.
While both have their own pros and cons, here’s a breakdown of each method:
1. Using a Pre-Built Google Sheets Calendar Template
You can find many pre-built calendar templates in Google Sheets. Some of these are already in there by default while you can also copy and use third party calendar templates as well.
- Simple and quick: Google Sheets offers predefined calendar templates, saving you time and effort.
- Pre-formatted designs: Choose from various styles and layouts to match your needs.
- Limited customization: Templates offer preset configurations, so modifications might be limited.
i. Step-By-Step Guide To Use Google Template
Follow these simple steps below to use Google’s own default templates to make a calendar in Google Sheets.
Step 1: Open Google Sheets
Open a new Google Sheets file by logging on to sheets.google.com on your web browser. Make sure you’re logged in from one of your Gmail accounts.
Step 2: Choose Template from Template Gallery
Click on File > New > From template gallery.
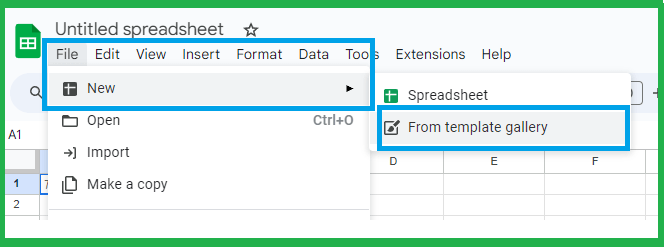
Step 3: Go To the “Personal” Section
In the search bar, type “calendar” or navigate to the “Personal” section
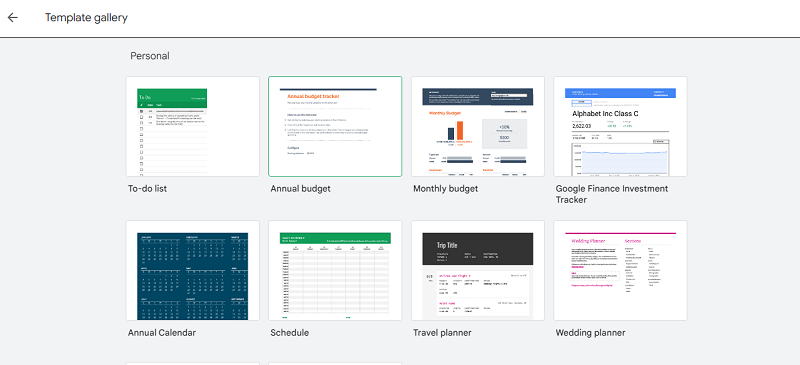
Step 4: Select Calendar Template
Select your preferred calendar template (e.g., Annual Calendar, Project Planner).
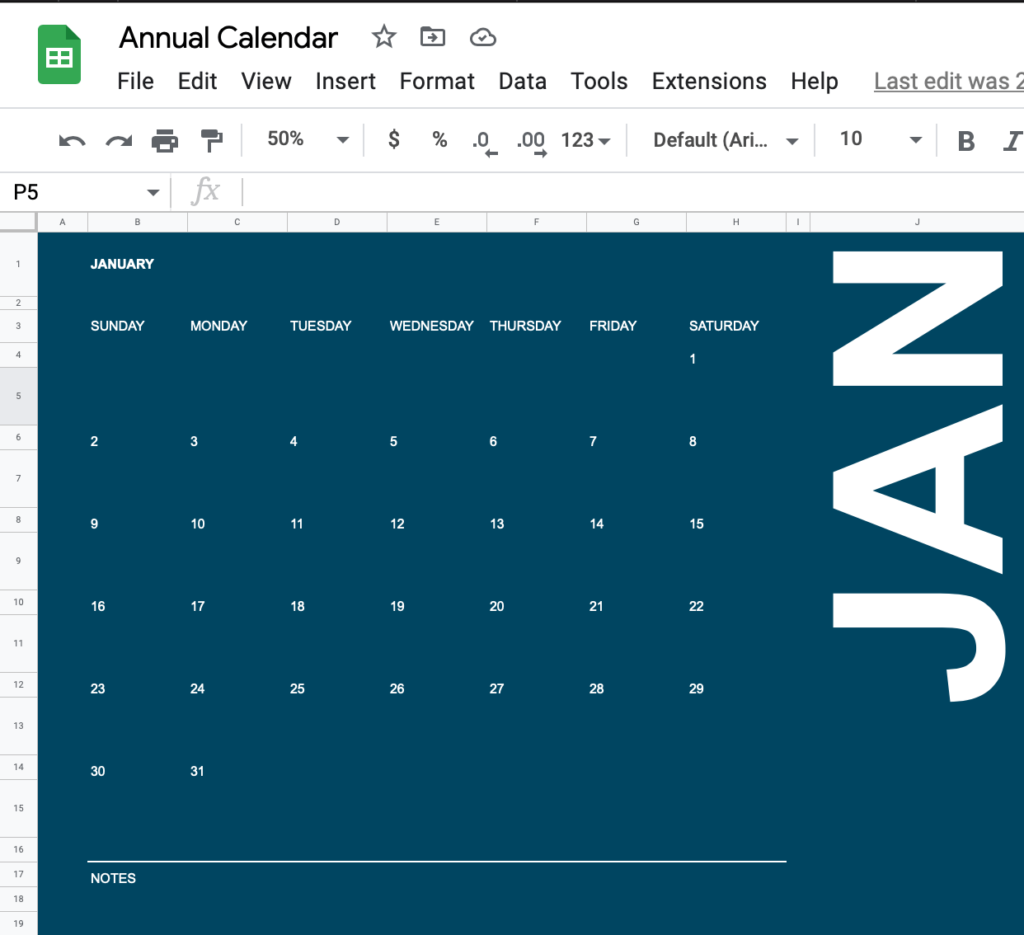
Step 5: Edit & Customize the Template
The template opens in your workbook with the entire year on the first tab and each individual month on the remaining tabs. Feel free to edit the template with your desired dates, events, and formatting.
Customize your calendar by clicking on the “Customize Your Calendar” tab and follow the instructions in it to customize your template.
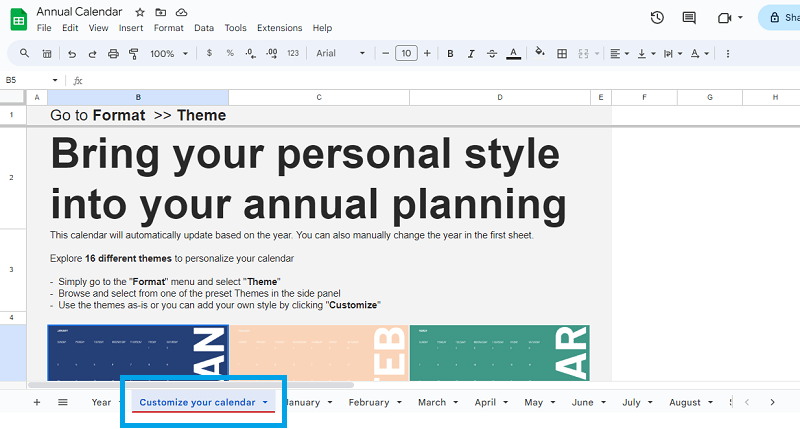
Step 6: Save & Print Your Calendar
Save your calendar online or print it out to use in your office!
ii. Step-By-Step Guide To Use Third Party Calendar Templates for Google Sheets
Using third party Google Sheets template is quite simple. You can either copy the template or install add-ons to start using it:
Step 1: Search The Web For Google Sheets Calendar Templates
Search for “(Free) Google Sheets Calendar Templates” using your favorite search engine. For simplicity, you can log on to websites such as Spreadsheet Class, Vertex42 and Smartsheet that offer free Google Sheets templates.
Step 2: Select a calendar to see full details and use it with Google Sheets
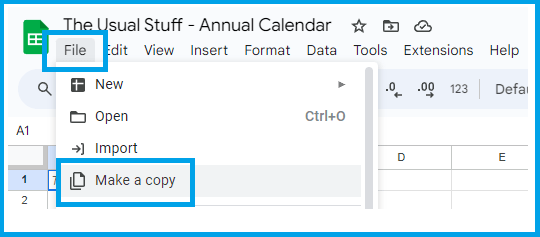
Some of these websites require you to install add-ons (like Vertex42) while others may allow you to use their calendar templates straightaway (such as Spreadsheet Class). You just have to make a copy of these templates while logged on to your own Google Sheets account to start using them as your own.
2. Make Your Own Google Sheets Calendar
If you like to use your own stuff that you developed yourself then you might be wondering how you can make your own calendar in Google Sheets.
Although creating your own calendar requires more effort but you can add your own customized features so that makes it worth the effort. Therefore, in this section, we’ll get our hands a little dirty by creating our own vertical calendar where you can add your own functions as well.
Here are the steps that you need to follow.
Step 1: Open a New Google Sheet
Open a new Google Sheets file by logging on to sheets.google.com. Make sure you’re logged in from one of your Gmail accounts.
Step 2: Set The Title & Header
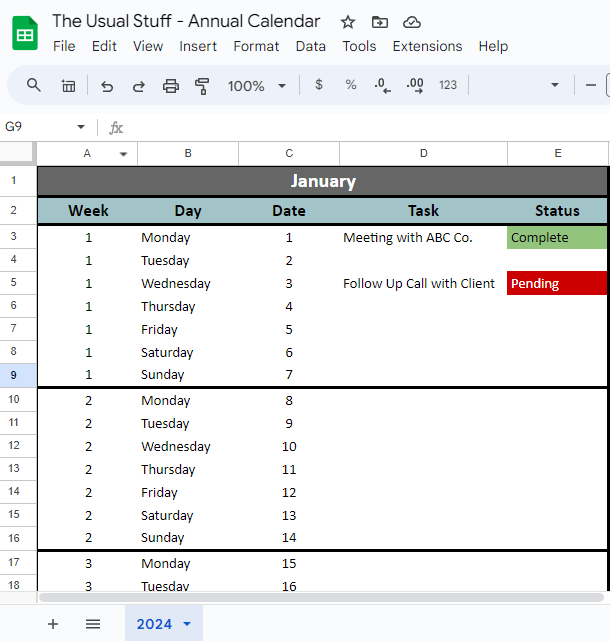
Name your calendar and fill in the month or year in the first row. For this example, we’ll use the name of the month in the first row.
Step 3: Enter Numbers for Weeks, Date and Name of the Day in Respective Cells
Fill in the respective rows with the week number, day of the week, and the date. Although you can apply different formula to automatically fill up these cells. However, for the sake of simplicity, we will use the manual method for now.
Step 4: Add More Columns for Details
You can go ahead and add a few more columns to add more details to your calendar. The more the merrier. For instance, in our calendar, we’ve added two extra columns for Task and Status (columns D and E respectively).
The Task column simply gives details about what tasks need to be done and the Status column has some conditional formatting that changes color based on the value in it. This way any pending tasks will stand out from the rest.
Step 5: Format and adjust
Add borders, shading, or conditional formatting to highlight specific dates or events. You can also adjust the cell size and column width for a clearer layout.
Moreover, add more months beneath or in a new sheet following the same pattern.
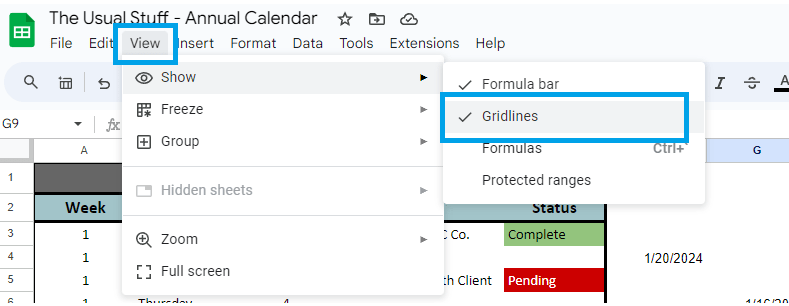
Bonus Tip: Remove the gridlines from VIEW > SHOW > VIEW GRIDLINES to give your calendar a clearer look.
Step 6 (Optional): Add Functionality
Implement formulas to track events, mark deadlines, or calculate days remaining. Google Sheets offers a wide range of functions for customization.
How to Share a Google Sheets Calendar?
Great! You’ve created your own personal calendar and have added events to it. But you don’t want it to stay personal anymore and want to share it with your friends or family and provide them with access. This step will teach you the exact same thing.
Here’s how you can share your Google Sheets calendar and provide access to other users:
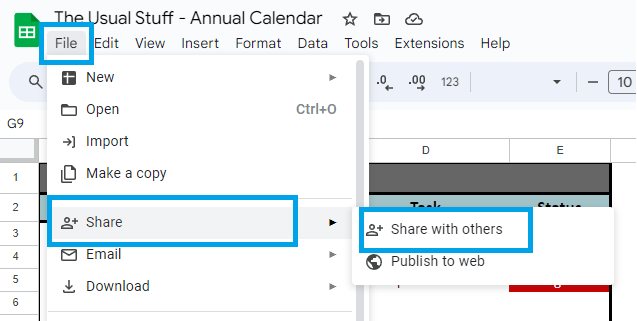
- Go to FILES > Share > Share with Others to share your calendar.
- Enter the email addresses of the people you want to share the calendar with.
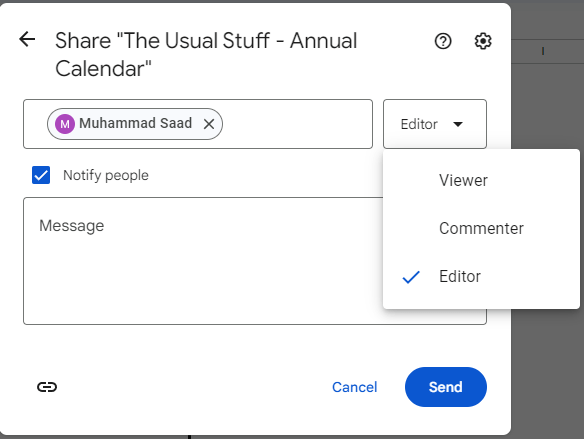
- Choose the level of access you want to give them.
- Click SEND to share your calendar.
Final Word
Creating a calendar in Google Sheets is a simple process that can help you stay organized and manage your time more effectively. With the steps outlined in this tutorial, you can create a calendar that meets your specific needs. So why not give it a try today?


Pingback: How to Perform What-If Analysis Using Microsoft Excel Solver Add-In? - The Usual Stuff