Writing & Printing Checks in Xero
You can write checks in Xero to send to your suppliers/vendors etc. and that without any cost whatsoever.
The best thing is that the system is pretty simple and easy to follow. All you have to do is create an expense (Spend Money Transaction), associate a check with it, print the check, download the check, and email/mail it to the concerned party. While printing, make sure that there’s enough ink in the cartridge (find them on https://www.inkpal.com.au/) so that all of what’s being printed is crystal clear to the receiver.
Before writing a check, one thing that I want you to know is that Xero provides a dummy organization (Demo Company Global) to practice different business processes. However, it’s quite unfortunate that you cannot write checks in it though.
The reason that I’m able to understand is that the demo organization has global settings whereas writing checks is purely a North American feature. That’s my opinion. However, do let me know if you think that the reason is something else in the comment section.
That said, various bookkeeping and accounting services are provided online that businesses can take advantage of in terms of keeping finances. All they might need is a separate merchant account, which they can choose with the help of Merchant Alternatives or the likes of it, to keep track of their sales. This sales data then can be fed to one of these accounting services or software, to get a better understanding of how the business is performing. These services can not only manage accounts but also issue checks and invoices on behalf of the businesses, thus keeping a track of the various expenditures and incomes of the company.
The online checks issued, could be printed by various printing services, like Check O Matic (check out their service page at https://www.checkomatic.com/order-quickbooks-checks) which partner up with these bookkeeping websites, and the checks thus, are compatible with the accounting site that the business has hired to look after its finances. Companies often take the help of these services and their additional features to grow exponentially in their business and increase efficiency in the working of the financial process.
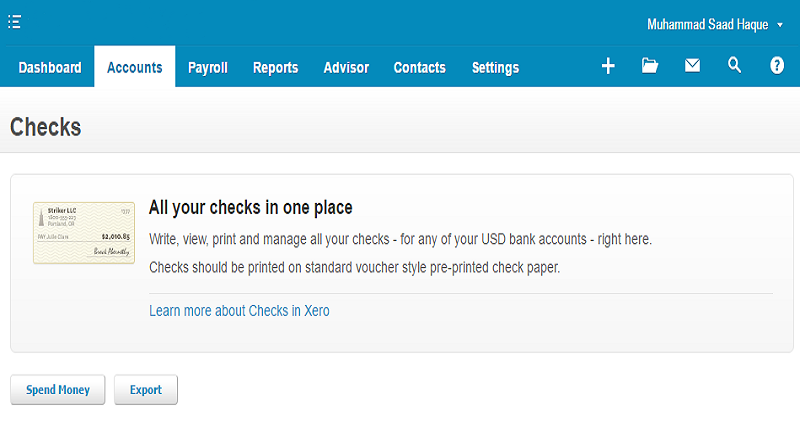
Nonetheless, here the step by step guide of writing checks in Xero:
- From the menu bar in your Xero account, click the “Accounts” option.
- The fourth option (or the sub-menu) will be of “Checks”. Click it to get to the window where you can write checks.
- Once you are there, you will see two buttons in front of you. The first on your left is “Spend Money” button and the second one right beside the spend money button is the “Export” button. The “Export” button will download the template according to which you need to organize and input your data so that the data can be imported back in Xero. We won’t discuss this method in this article and will stick to the first button which is the “Spend Money” button.Of course, writing checks mean that you are spending money so in order to create a check, you first need to make sure that there is a “Spend Money” transaction in your system.
- Once you click the “Spend Money” button, a pop up window will appear asking for the bank account from which you want to pay your check. Select the bank you deem appropriate and click continue.
- The Spend Transaction window will appear which will have the option, “Pay By Check” already checked indicating that this transaction will be associated with a check. Enter the relevant information such as the name of the vendor, transaction date, Item Code (if applicable), account (of your books) and the amount and then click “Save”.
- As soon as you’ll click save, a pop up window will open asking for the basic information your check will carry such as the check number, Payee, Date, Memo, Amount etc. Some of the fields will already be filled from the Spend Transaction window but you can change it over here in case you want to. Additionally, you can select which template (of check) you want to use in case you have uploaded or designed any new template for your check. By default, it’s a standard format provided by Xero.
- Once you are happy with the information of the check, click the “Save & Print PDF” button to download the PDF version. A PDF version of the check will be downloaded in your system which can now be mailed to your Payee.
One thing to note is that once the check is created in Xero, just like an invoice, it cannot be deleted. However, it can only be voided which means that if you assign a number to a check and then void it, you cannot use that number again even though you have voided the check before having the same number.


Thanks for your personal marvelous posting! I actually enjoyed reading it, you could be a great author. I will remember to bookmark your blog and will often come back sometime soon. I want to encourage that you continue your great posts, have a nice afternoon!|
Thanks Kirsten,
Truly Appreciate it.